Changing your domain's nameservers is an important step when you want to point your domain to a specific hosting provider or custom DNS setup. At PyNoxi Web Solutions, the process is straightforward. Follow this step-by-step guide to change your domain's nameservers easily.
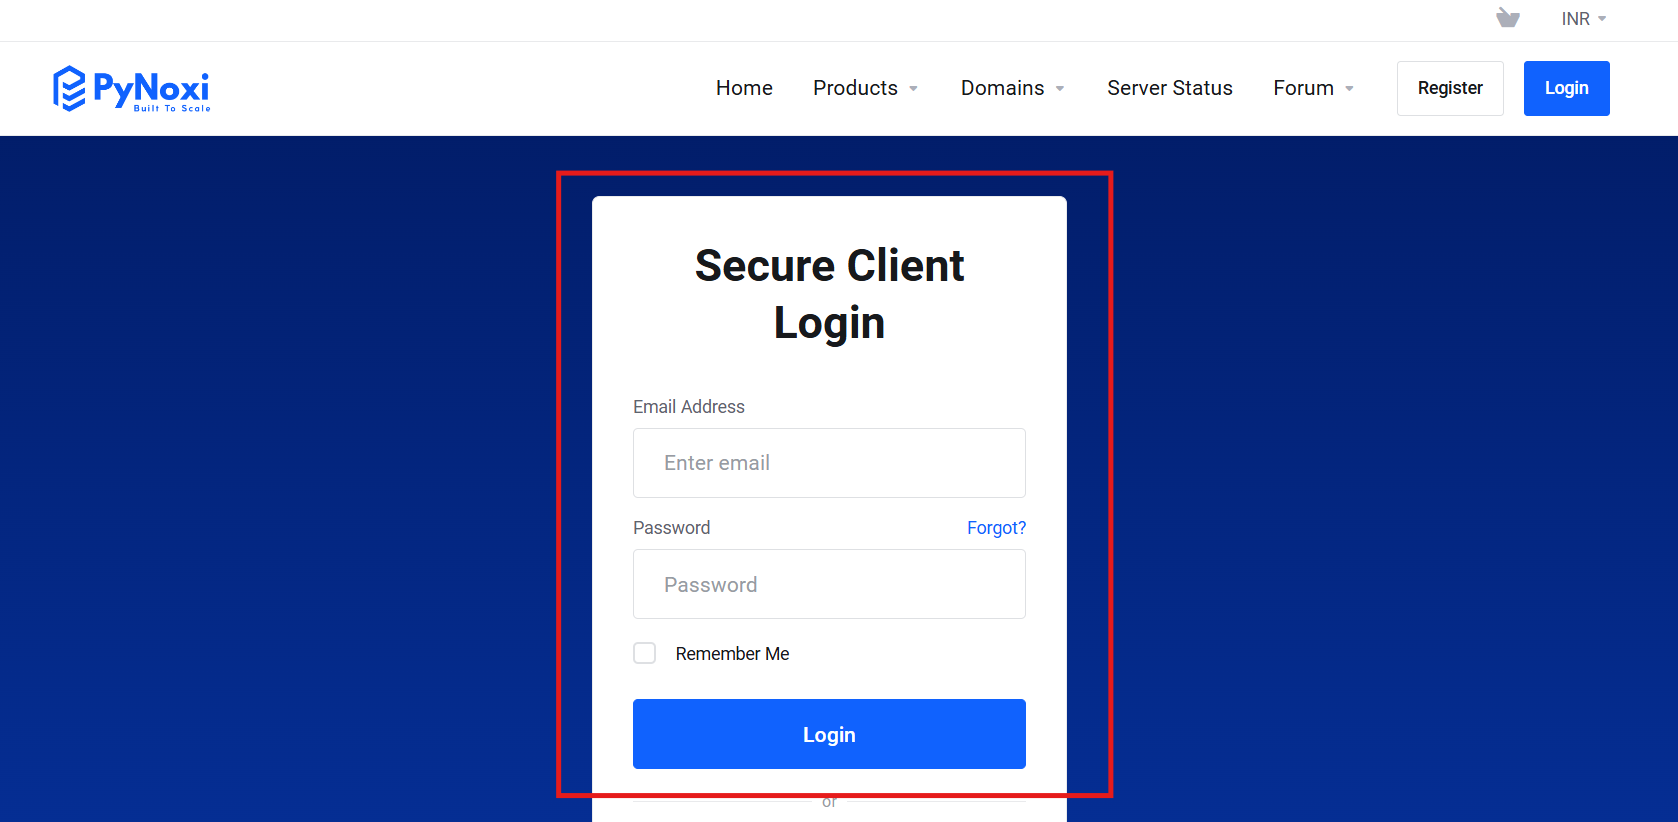
Step 1: Log in to Your PyNoxi Client Area
First, visit PyNoxi's client area and log in using your registered email address and password. If you don't remember your credentials, use the Forgot Password option to reset them.
Step 2: Navigate to the "Domains" Section
Once logged in, follow these steps:
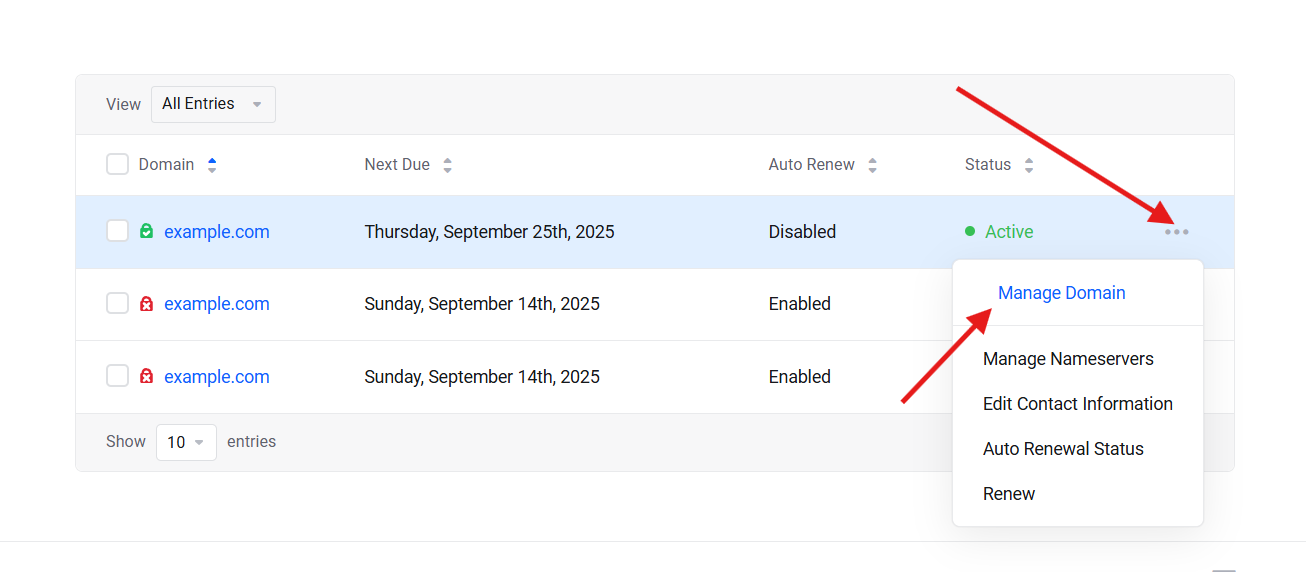
Click on the Domains tab in the navigation menu.
Select My Domains to view a list of all domains you own.
Step 3: Select the Domain You Want to Modify
In the "My Domains" section, find the domain for which you want to change the nameservers. Click the Manage button next to it to open the domain management page.
Step 4: Access the Nameserver Settings
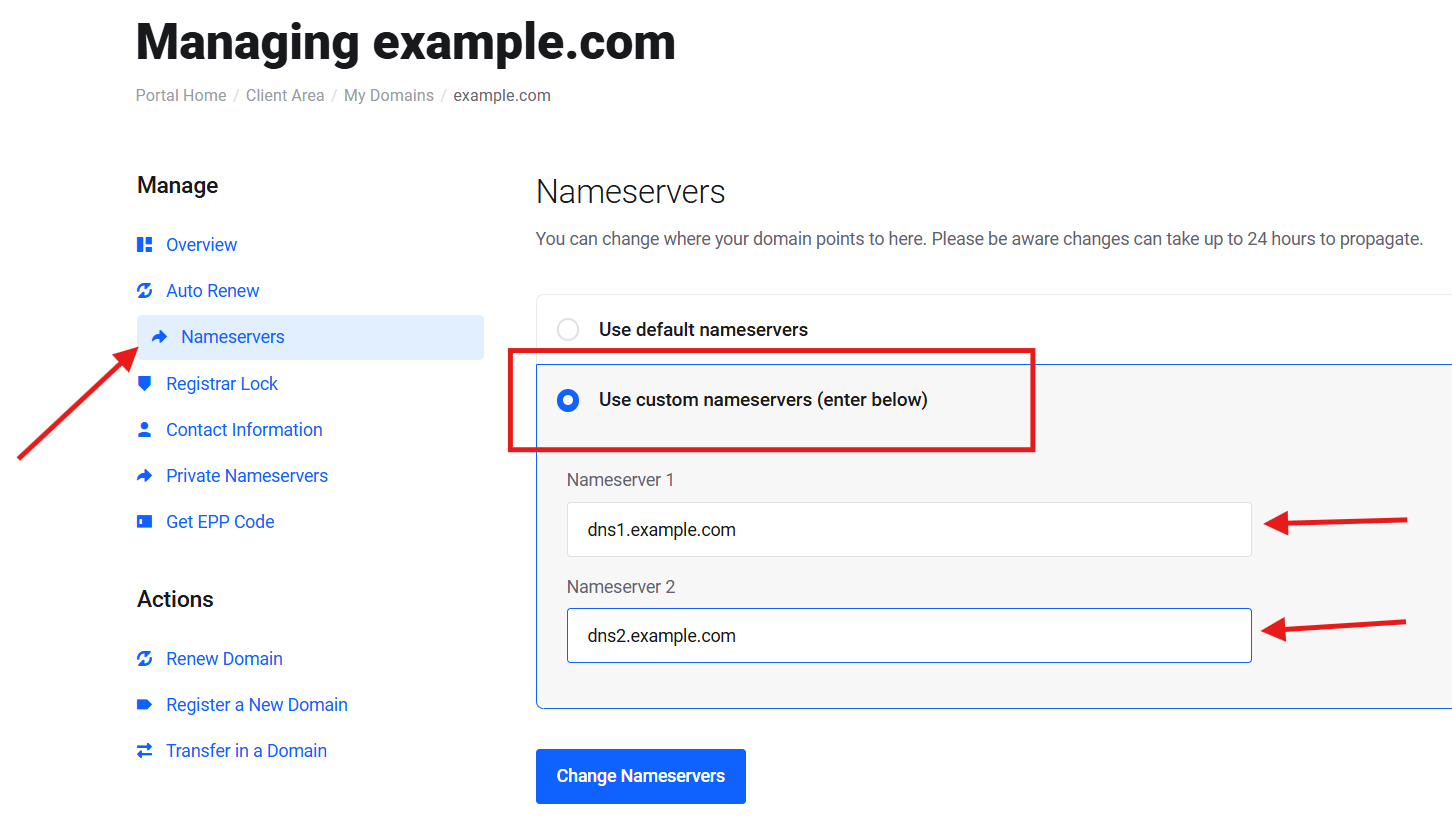
On the domain management page, locate the Nameservers section and click on it. You will see two options:
Step 5: Choose "Use Custom Nameservers"
To update your nameservers, select the Use Custom Nameservers option. This will enable input fields where you can enter the new nameserver details.
Example:
If your hosting provider has given you the following nameservers, input them accordingly:
ns1.example.com
ns2.example.com
Ensure that you enter the nameservers exactly as provided, without any typos or extra spaces.
Step 6: Save Changes
After entering the custom nameserver details, click the Save Changes button. Your domain will now point to the new nameservers.
Note: DNS changes can take up to 24-48 hours to propagate worldwide. During this time, your website or email services might experience intermittent issues.
Step 7: Verify the Update
Once the changes are saved, you can verify the update by using online DNS propagation tools or by checking the domain settings after a few hours. Ensure that the new nameservers are reflecting correctly.
Helpful Tip:
If you're unsure about your hosting provider's nameservers, contact their support team or check the welcome email you received when you signed up for their services.
Visual Guide
To make the process even clearer, refer to the image below for a visual representation of the steps:
Step 1:

Step 2:

Step 3:

Step 4:

Step 5:
Click On Change Nameservers
All Done
By following these simple steps, you can easily update your domain's nameservers in PyNoxi's client area. If you encounter any issues or have further questions, feel free to reach out to our support team at info@pynoxi.com or via live chat on our website.